
Mt. Batulao is a famous travel spot among beginners (mountaineers) because it’s supposedly an easy hike–a day trip that takes a minimum of just 2 hrs to get to the summit. It’s 811+ meters above sea level (masl) and has a difficulty rate of 4/9, according to Pinoy Mountaineer.
Thinking that I was able to brave Mt. Pulag, which was way higher (2,922 masl) and took 2 days to climb, I eagerly invited my friends to sign up for the Trail Adventours Mt. Batulao trip on a Sunday. Little did I know that that would be the longest Sunday of my life and one of the most physically challenging, but one of my greatest adventures/achievements as well.
1. The most important thing you should know: Mt. Batulao is not an easy hike, at least for beginners like me. Haha. And when I say “beginner like me,” it means I’ve only climbed Mt. Pulag and Mt. Pinatubo (which doesn’t really count because that is the one that’s easy :p) before Mt. Batulao.
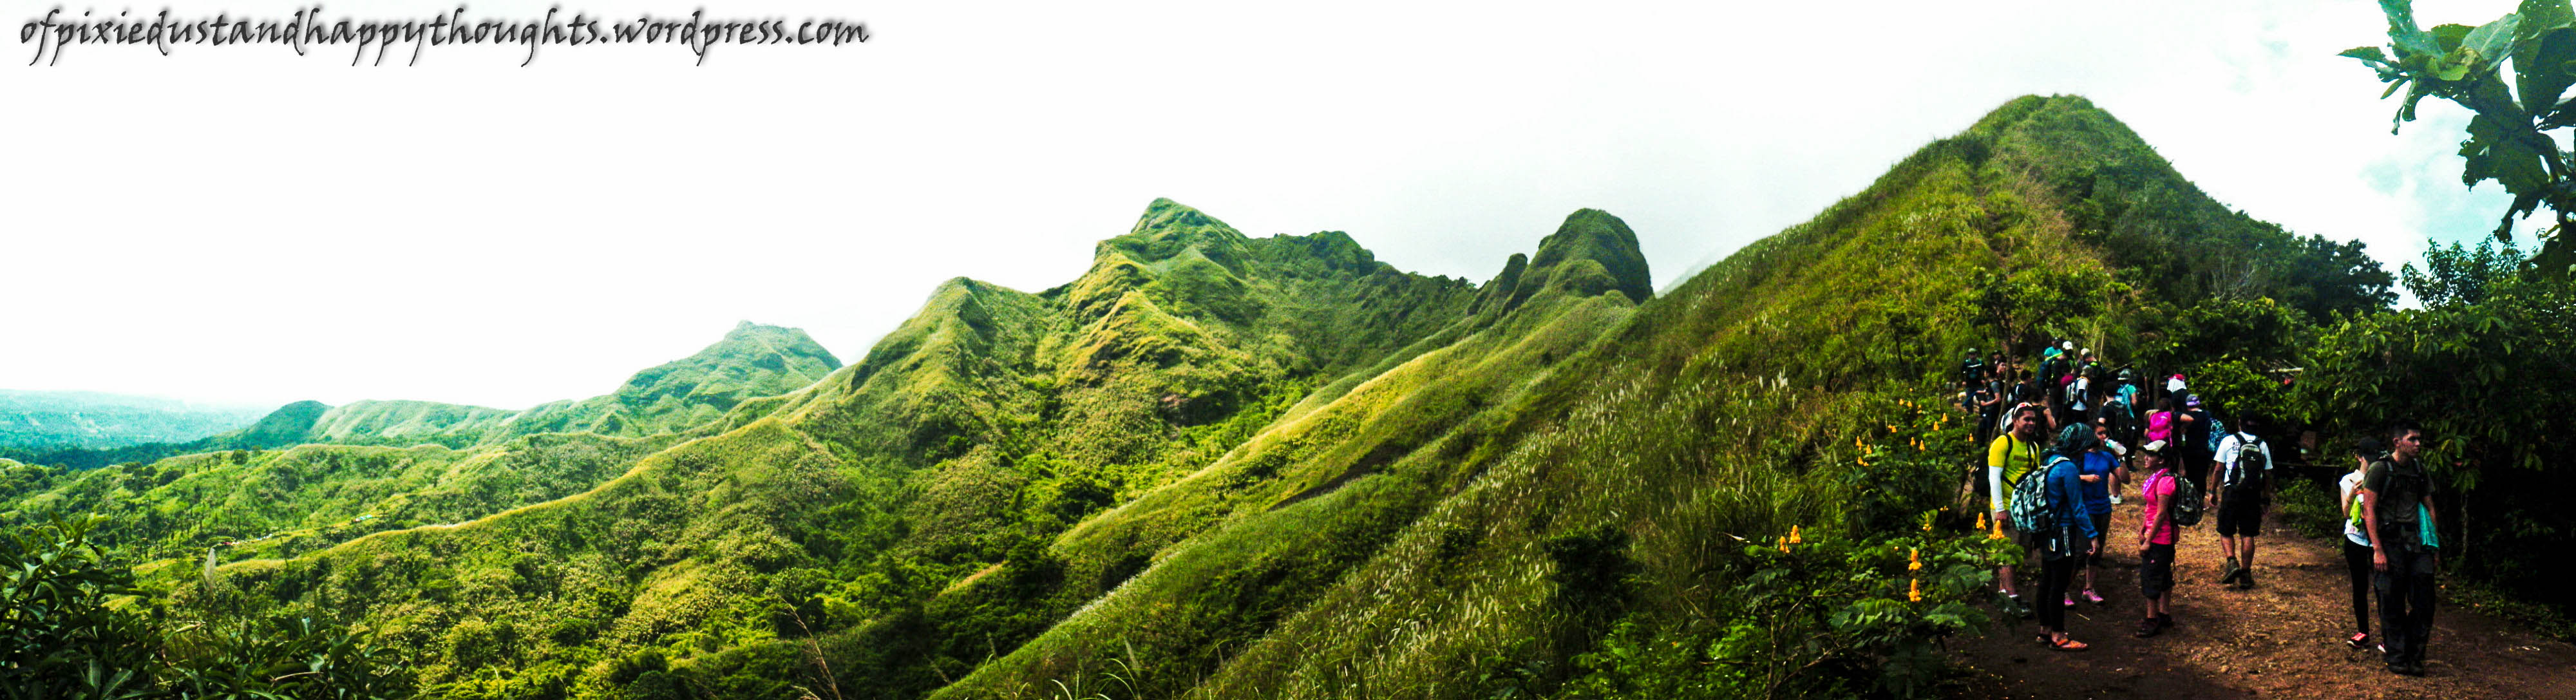
Mt. Batulao’s trail is much more dangerous than Mt. Pulag’s. We made a traverse and took the Old Trail to get to the summit then took the New Trail to get down. The Old Trail is exposed (no shade) and involves very steep climbs. It requires you to walk along the natural edges of the mountain, so you’d have to walk through its curves by the cliff.
The trail is very narrow too, so you’d have to go on a single file as you climb. There are parts where the narrow trail is secured with bushes and overgrown grass on both sides, so you’d somehow feel safe because you don’t see the cliffside. But there are also several parts where the narrow trail is really exposed, with the cliff right at your sides. Just one misstep and you’ll be one of the statistics in Mt. Batulao.
2. One particulary dangerous part where I actually feared for my life (exagg I know, but it’s true) is the ridge part. It’s beautiful when you look at it from afar, but you’d hate hiking through it. The trail there consists of huge, uneven rocks, with the cliff at your sides, seemingly ready to swallow you up. To safely pass through it, you’d have to sit down on the rocks and use your hands and butt to ensure that you don’t slip.
3. Mt. Batulao’s trail involves rappelling. In the Old Trail, after the dangerous part that I just talked about, the last hurdle to the summit is an ascent that requires you to climb using a rope. It’s a short ascent that’s fairly easy, but if you’ve been walking for too long, you’d have to exert extra effort to pull yourself up.
The rappelling part in the New Trail is a different story, however. From the summit, we had to walk a few steps down and then stop for an instruction from our guide on how to rappel through the somehow steep trail. We were almost 30 in the group and we had to rappel one by one, which took a lot of time. Joseph, Dee and I were among the last people in the line, and when it was almost our turn to rapell, it started raining real hard which made the trail slippery and muddy. The fog also covered the mountain and we could no longer see the Old Trail from where we stood.
The rappelling experience was not as difficult or scary as I anticipated since each of our guides was stationed at every point of the trail to assist us. I initially wanted to skip the rapelling part and just go down using my butt and hands, but it’s not advisable since the trail is somehow steep and the rain made the conditions worse. I guess what’s difficult about the rappelling part is it’s long, so by the time I was halfway down, my arms and legs were already tired and I had to stop for a while to rest.
After rappelling, the trail down is still steep, but I found it easier because I was an expert in using my hands and butt in going down. That’s the only safe way anyway. 😛
4. When it rains, be prepared to walk through miles and miles and miles of mud. I anticipated the rain since it’s rainy season, but I wasn’t prepared for the miles of mud on our way back from the summit. The amount of mud we had to wade through was unbelievable; I’ve never seen so much mud in my life, haha. As it turned out, the trail turns into a clay-like mud when soaked, and since most of the trail back to the residential village is made of “soil,” we had to endlessly walk through mud as we made our way down from the summit.
Our group took a lot of time going down because most of those we were with struggled with the mud, with some of them slipping occassionally. As for me, I was thankful that my new trail shoes had good traction on mud, so I avoided slipping accidents. The downside though–the mud sticks to the sole of your shoes after a while, which makes them heavier, making it more difficult to walk.
To successfully wade through the mud, we had to pick the right spots to step on, those that don’t look slippery, and avoid those with skid marks for obvious reasons. However, there are several parts of the trail where there didn’t seem to be right spots, and we had no choice but to go along because we wanted to get back just before it turned dark. What made the mud worse is the horse’s footprints on it, which created puddles, plus the dung of animals, which you can easily slip on if you’re not careful.
5. The tricycle ride finishes off your adventure, but it can make or break you. Because it took us a lot of time to get down from the summit, we were still halfway to our starting point (where the vans were waiting for us) when evening came. We expected to be back before dark, so only Joseph had a headlamp to aid us through our way. Fortunately, we learned from a resident we came across that there are tricycles that could take you back to the highway.
The tricycle costs Php 100; it would seem expensive but you’d realize that the amount is just right after you survive the ride. Haha. The tricycle ride amazingly (and scarily) went through the muddy, rocky and uphill trail, and it was nerve-wracking because it seemed as though it would turn over every time it struggled through a big rock. It also seemed like the engine would die on us and the trike would slide back down whenever it struggled through the uphill routes. Fortunately, we made it back with zero accidents and we were very happy to finally be able to take a bath after our long hike.
Other Stuff You Need to Know:
– You can take a shower in the houses of the residents after your hike. They willingly offer their homes, which are equipped with shower areas. The shower areas don’t have running water though. The owner of the house just fetches a pail of water for you before you take a bath.
– The residents offer shoe cleaning services too. This is especially handy because you won’t need to tag along your dirty shoes all the way home. They just clean the obvious parts though, excluding the sole. They also soak the entire shoes, so make sure that you have alternative footwear with you.


Leave a comment